가상 키보드 1 2 3 $ npm i -D webpack webpack-cli webpack-dev-server $ npm i -D terser-webpack-plugin
webpack.config.js 1 2 3 4 5 6 7 8 9 10 11 12 13 14 15 16 const path = require ('path' ); const TerserWebpackPlugin = require ('terser-webpack-plugin' );module .exports = { entry : './src/js/index.js' , output : { filename : 'bundle.js' , path : path.resolve (__dirname, './dist' ), clean : true , }, devtool : 'source-map' , mode : 'development' , optimization : { minimizer : [new TerserWebpackPlugin ()], }, };
html 관련 설정 모듈 1 $ npm i -D html-webpack-plugin
webpack.config.js 1 2 3 4 5 6 7 8 9 10 11 12 13 14 15 16 17 18 19 20 21 22 23 24 25 26 27 28 29 30 const path = require ('path' );const TerserWebpackPlugin = require ('terser-webpack-plugin' );const HtmlWebpackPlugin = require ('html-webpack-plugin' );module .exports = { entry : './src/js/index.js' , output : { filename : 'bundle.js' , path : path.resolve (__dirname, './dist' ), clean : true , }, devtool : 'source-map' , mode : 'development' , plugins :[ new HtmlWebpackPlugin ({ title :'keyboard' , template :'./index.html' , inject :'body' favicon : './favicon.ico' }) ] optimization : { minimizer : [new TerserWebpackPlugin ()], }, };
css 관련 설정 모듈 1 $ npm i -D mini-css-extract-plugin css-loader css-minimizer-webpack-plugin
webpack.config.js 1 2 3 4 5 6 7 8 9 10 11 12 13 14 15 16 17 18 19 20 21 22 23 24 25 26 27 28 29 30 31 32 33 34 35 36 37 38 39 40 41 42 43 44 45 const path = require ('path' );const TerserWebpackPlugin = require ('terser-webpack-plugin' );const HtmlWebpackPlugin = require ('html-webpack-plugin' );const MiniCssExtractPlugin = require ('mini-css-extract-plugin' );const CssMinimizerPlugin = require ('css-minimizer-webpack-plugin' );module .exports = { entry : './src/js/index.js' , output : { filename : 'bundle.js' , path : path.resolve (__dirname, './dist' ), clean : true , }, devtool : 'source-map' , mode : 'development' , plugins : [ new HtmlWebpackPlugin ({ title : 'keyboard' , template : './index.html' , inject : 'body' , favicon : './favicon.ico' , }), new MiniCssExtractPlugin ({ filename : 'style.css' , }), ], module : { rules : [ { test : /\.css$/ , use : [MiniCssExtractPlugin .loader , 'css-loader' ], }, ], }, optimization : { minimizer : [new TerserWebpackPlugin (), new CssMinimizerPlugin ()], }, };
index.html 1 2 3 4 5 6 7 8 9 10 11 <!DOCTYPE html > <html lang ="ko" > <head > <title > <%= htmlWebpackPlugin.options.title %> </title > </head > <body > </body > </html >
switch btn 만들기 1 2 3 4 <label class ="switch" > <input id ="switch" type ="checkbox" > <span class ="slider" > </span > </label >
input을 체크하면 span의 가상요소가 왔다갔다하는 방식
1 2 3 4 5 6 7 8 9 .switch { position :relative; width :60px ; height :34px ; } .switch input { display : none; }
label에 사이즈를 주고 input을 안보이게 설정
다음 span에 스타일을 준다
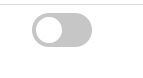
1 2 3 4 5 6 7 8 9 10 11 .slider { top : 0 ; left : 0 ; right : 0 ; bottom : 0 ; position : absolute; cursor : pointer; background-color : #c6c6c6 ; border-radius : 34px ; transform : 0.4s ; }
이제 실제로 움직이는 버튼은 span의 가상 요소로 만들어 준다
1 2 3 4 5 6 7 8 9 10 11 .slider ::before { position : absolute; content : '' ; height : 26px ; width : 26px ; left : 4px ; bottom : 4px ; background-color : white; transition : 0.5s ; border-radius : 50% ; }
인풋의 체크 여부에 따라 가상요소가 좌우로 움직이고
1 2 3 4 5 6 input :checked + .slider { background-color : black; } input :checked + .slider ::before { transform : translateX (26px ); }
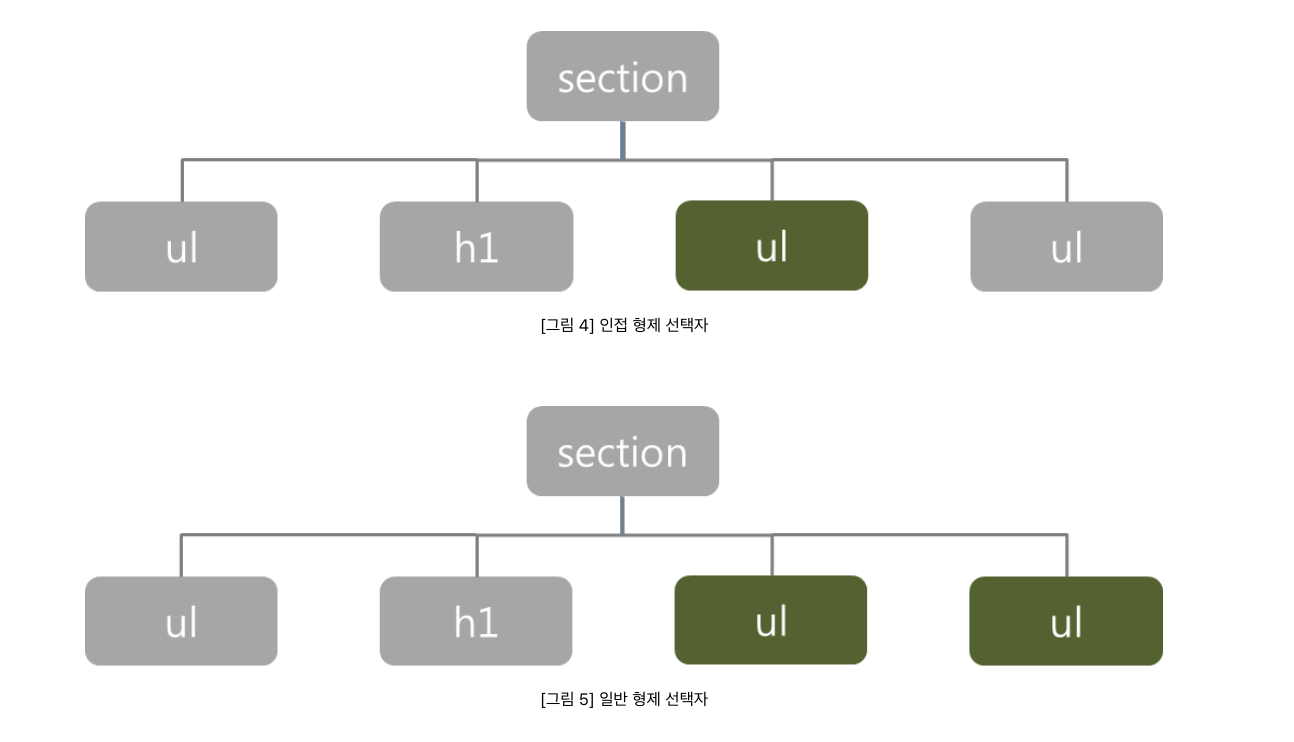
css + 선택자는 인접 형제 선택자
인접 형제 선택자와 일반 형제 선택자
1 2 3 4 h1 +ul { background :yellowgreen; color :darkgreen;}h1 -ul { background :yellowgreen; color :darkgreen;}
https://www.nextree.co.kr/p8468/ 형 요소, 나중에 나오는 요소를 동생 요소 라고 한다.
dark mode 적용하기 css custom attribute id 나 class 같은 속성 외에 커스텀한 속성도 사용 할 수 있다
css에서 선택할때는 []에 속성값을 적어서 선택할 수 있다
1 html [theme='' ] {filter : invert (100% ) hue-rotate (180deg );}
filter 이미지에 효과를 줄 수 있다blur, grayscale 등등 있다invert는 이미지의 샘플을 반전 시킬 수 있고 0% 가 기본값이고 100%가 최대hue-rotate는 이미지의 색조를 회전 시킬 수 있다 0deg(0도)가 기본값이고 360deg(360도)가 최대
스위치 적용 스위치를 누를때마다 theme속성으로 dark-mode가 적용되게 js를 만들어 주면된다
1 2 3 4 5 6 7 8 9 const switchEl = document .getElementById ('switch' );export const Keyboard = ( switchEl.addEventListener ('change' , (event ) => { document .documentElement .setAttribute ( 'theme' , event.target .checked ? 'dark-mode' : '' ); }); };
font 변경하기 html 작성할때 select 옵션의 value로 fontfamily들을 설정 해 두었다
1 2 3 4 5 6 7 8 9 <div class ="select-box" > <label for ="font" > Font:</label > <select name ="" id ="font" > <option value ="" disabled selected > Choose Font</option > <option value ="Comic Sans MS, Comic Sans, cursive" > Font 1</option > <option value ="Arial Narrow, sans-serif" > Font 2</option > <option value ="Chalkduster, fantasy" > Font 3</option > </select > </div >
해당 옵션을 선택했을때 body의 fontfamily를 value 값으로 설정 해주면 된다
1
2
3
4
5
6
7
8
9
10
11
12
13
14
15
16
const fontSelectEl = document .getElementById ('font' );export const Keyboard = ( switchEl.addEventListener ('change' , (event ) => { document .documentElement .setAttribute ( 'theme' , event.target .checked ? 'dark-mode' : '' ); }); fontSelectEl.addEventListener ('change' , (event ) => { document .body .style .fontFamily = event.target .value ; }); };